

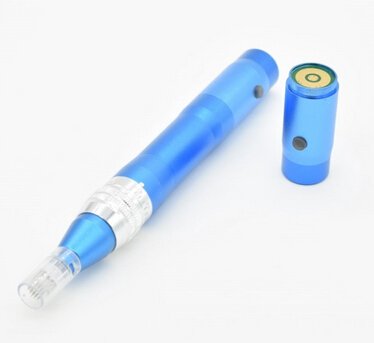
How to use Electric Dermapens and Microneedling Pen
Electric Dermapens are easy to use. Find out how!
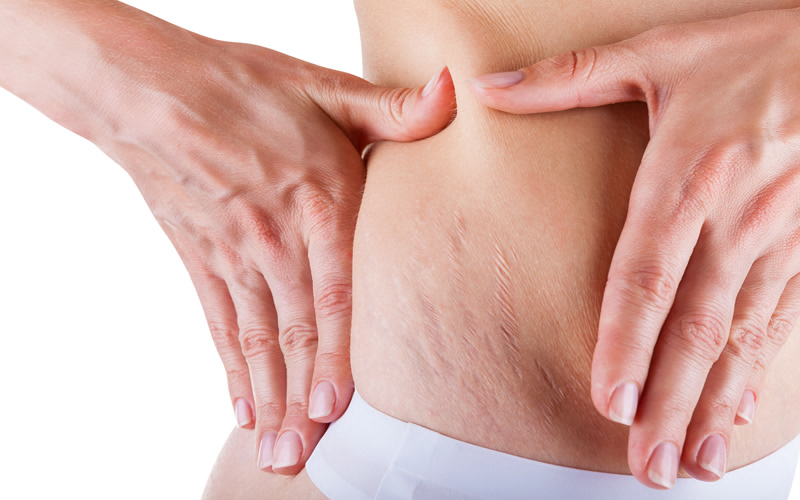
Microneedling is very effective, simple, safe and minimally invasive therapeutic method for many different skin issues, like stretch marks, acne scars, burn scars, skin rejuvenation and much more. As well as microneedling technique has evolved a lot during the last 10 years, so does the different instruments that you use for the microneedling procedure. In particularly we are going to focus on electric dermapens in this article to show you, what are the benefits of electric dermapens and how does the procedure or microneelding looks like.
Click here to get your own!
Procedure overview
Microneedling is a technique that creates micropunctures on the skin by using microneedles that produce a controlled skin injury but doesn’t damage the epidermis of the skin. Those microinjuries lead to superficial bleeding that set up a wound healing procedure in the skin and releases variety of different growth factors, it also breaks down the old hardened scars. The process can significantly increase collagen and elastin deposition inside the skin.
The needles do not create a wound in a real sense, but rather trick the body cells into believing that there is an injury so our body would release different proteins and growth factors for it, including collagen. All that results in better looking and tighter skin and filling-up of atrophic scars which will have much better overall appeal.
Preparing for the procedure
Procedure itself is simple and take about 10-20 minutes depending on the treated area. Before the actual procedure it is good to get acquainted with what the expected outcome would be and approximately how many procedures it will take. Results of microneedling are not shown imminently, so it is good to know all this before starting the procedure to avoid any false expectations. Usually the skin needs to be prepared prior about a month to the procedure with vitamins C and A to induce formation of collagen in the skin. We suggest you to take a look at our serums section for this.
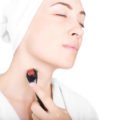
The procedure will be performed under local anesthesia of lignocaine and prilocaine mixture for up to one hour. While performing this procedure yourself at home with your electrical dermapen, we suggest you to use numbing cream before starting the procedure.
Performing the Electric Dermapens procedure
The skin has to be stretched out with one hand from the area on which you want to perform the procedure on. Procedure is done over the skin with electric dermapen at least 5 times in horizontal and vertical directions. You might be wondering, how would I know when it is enough to stop? Indication to the end of the procedure is tiny pinpoint bleedings that occurs on the skin.
When you do this at home we advise you to keep a spray water bottle and a small towel nearby while you perform the procedure. Water will moisturize your skin and help the dermapen to slide better on the skin. Towel you might need to wipe off some of the bleeding if necessary. Before starting to actually puncturing your skin it is good to apply some hyaluronic and/or peptide serums on your skin. The needles will push the serums into your skin while micropuncturing and it helps you to boost the skin and really maximize the collagen formation inside the skin afterwards.
Applying serums before the procedure if necessary helps the dermapen to glide better on the skin as well. During the procedure it is good to either apply a little bit more serum or use the water spray bottle to make dermapen slide smoothly on the skin. After switching on your electric dermapen slide it on your skin vertically and horizontally many times over the same area of the skin.
Post-procedure care
Right after the procedure it is good to make the skin wet with saline solution or some cooling agent to let the skin cool down. In case you have missed a spot you wanted to do, you can see it later on your skin as the red areas are the ones where you performed the micropuncturing procedure and significantly lighter areas are the ones that were not affected.
After that for a few days we suggest you to use sunscreen for that part of the skin actively. The redness of the skin called erythema and edema, which is swelling of the skin, might last for 2 or 3 days after the procedure, this is completely normal. Normally in clinics this type of procedure is done with 3-8 week intervals at least and we suggest you to do the same when using dermapen at home.
To get the desired result of the skin very often it takes more then one procedure to get there. It is important to know that the final results can’t be seen right away after the procedure, because the newly formed collagen continues to be laid down for about 3-6 months after the treatment. So it is vital to acknowledge that this is a long-term process.
Advantages of electric dermapens
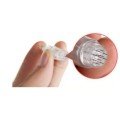
- Very sanitary as with each use you put fresh disposable needles in the electric dermapen, whereas a roller you will have to clean each time after use or take new one each use.
- Safe for the skin as it will not injure the epidermis of the skin.
- Safe to use as the needles are hidden inside the guide.
- Convenient to use on the narrow areas like around your eyes and lips or on the nose without injuring the adjoining skin.
- Reusable – you won’t need to buy a new instrument every use since you dispose the needle guide after the use.
Start with choosing your electric dermapen today
Works Cited
Singh, A. and Yadav, S. (2016).
Microneedling: Advances and widening horizons. Indian dermatology online journal, 7(4), 244–254.
Related Posts About Dermarolling:
 Microneedling At Home
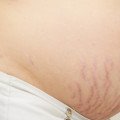 Troubled with Stretch Marks After Giving Birth? How Microneedling Helps Reduce Stretch Marks or Visible Striae?
 Can Derma Rolling Be Used As a Maintenance Treatment? How Long Should It Last?
 What to do when the Needle Broke in Your Skin? Must Know Helpful Tips Before You start using Dermastamps!

Please add your thoughts
Leave a Reply
Want to join the discussion?Feel free to contribute!